Many of you may think that setting up your Google My Business listing is enough for your business. But I’m here to suggest that going a little beyond the basics of a Google My Business listing might result in more traffic! Yes, my friend! Listing management is more than just setting up your Google My Business listing. The second most important listing platform after Google is Bing and should never be overlooked. If you are ready to learn how to set up and verify your business with Bing Places you are at the right place. We have prepared a step-by-step guide below that will help you set up your Bing Places Business listing.
This Blog Contains:
- Step 1: Go To Bing Places For Your Business Listing
- Step 2: Select The Option To Add Or Improve Your Bing Places Listing
- Step 3: How to Find Your Business on Bing Places
- Step 4: Add Your Business Information Correctly
- Step 5: Verification of Your Business on Bing Places
- How to verify your Bing Places listing using a Phone
- How to verify your Bing Places listing using Text Message (SMS)
- Bing Places listing verification using Business email
- Bing Local Listing Verification using Postcard
- How to verify your Bing Places listing using the Web Verification Method
- How To Verify Bing Places by Importing Your Google Business Profile
- Optimization Strategies – Bing Places For Business Listing
Step 1: Go to Bing Places for Your Business Listing
Before you begin, see if you can find your business using any previous business phone numbers or other ways you might search for it on Bing. This will help prevent you from adding your business accidentally twice in Bing! It is important to avoid creating a duplicate listing for your business. When you have established the fact that you do not have a business listing visible in Bing, you are ready to begin.
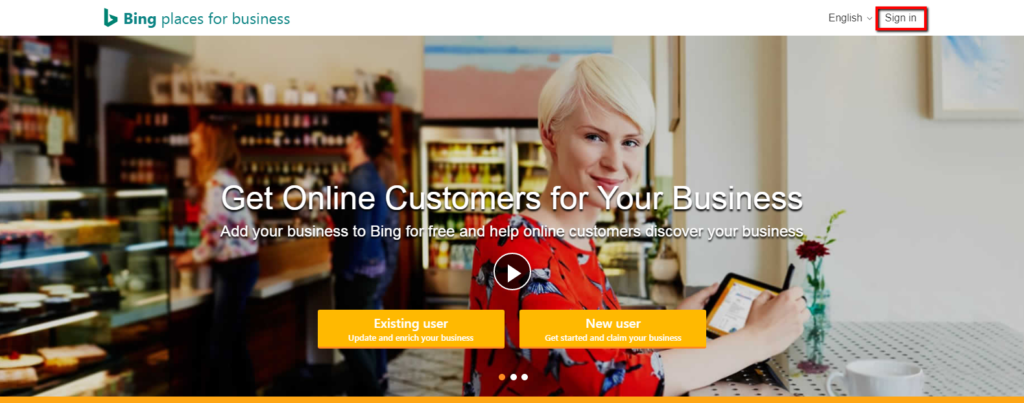
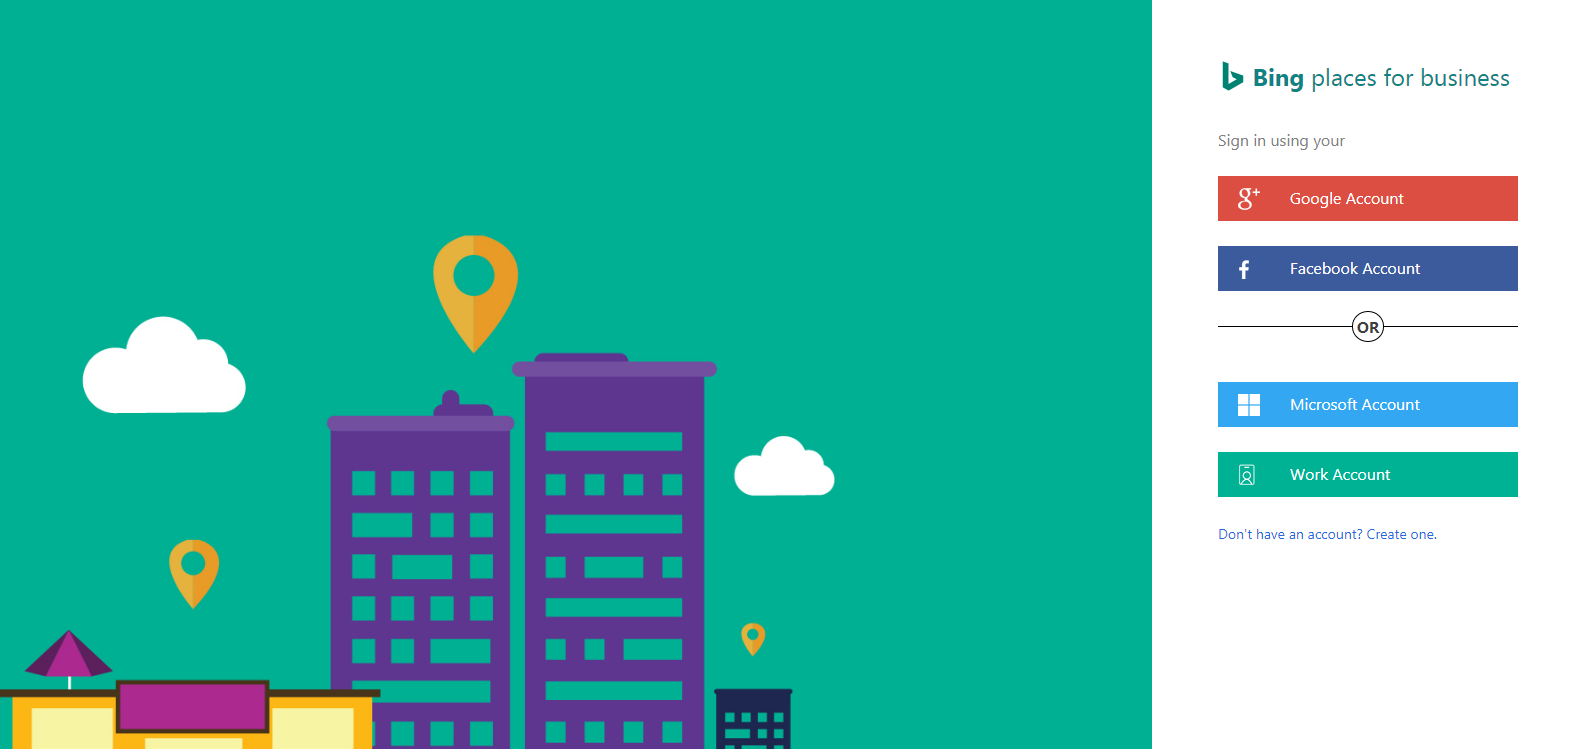
First of all, visit https://www.bingplaces.com/ and sign in with one of these email accounts; Google Account email, Facebook Account email, Microsoft Account email, or Website Domain Account email, if you have one. Otherwise, you need to create an email account before starting the process.
Step 2: Select The Option to Add or Improve Your Bing Places Listing
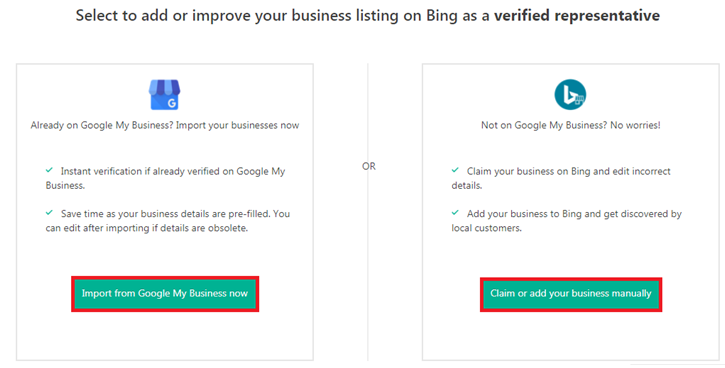
Once you have signed in, you’ll be presented with two options to go forward (as shown below). Bing now provides an easy method of instant verification for your business listing. You can import all your business information if you’ve already listed your business on Google My Business, or you can enter the information manually by clicking “Claim & Add Your Business Manually”.
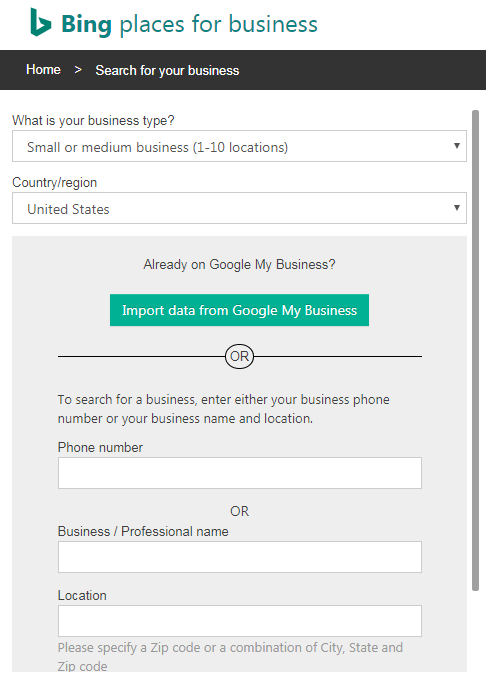
Step 3: How to Find Your Business on Bing Places
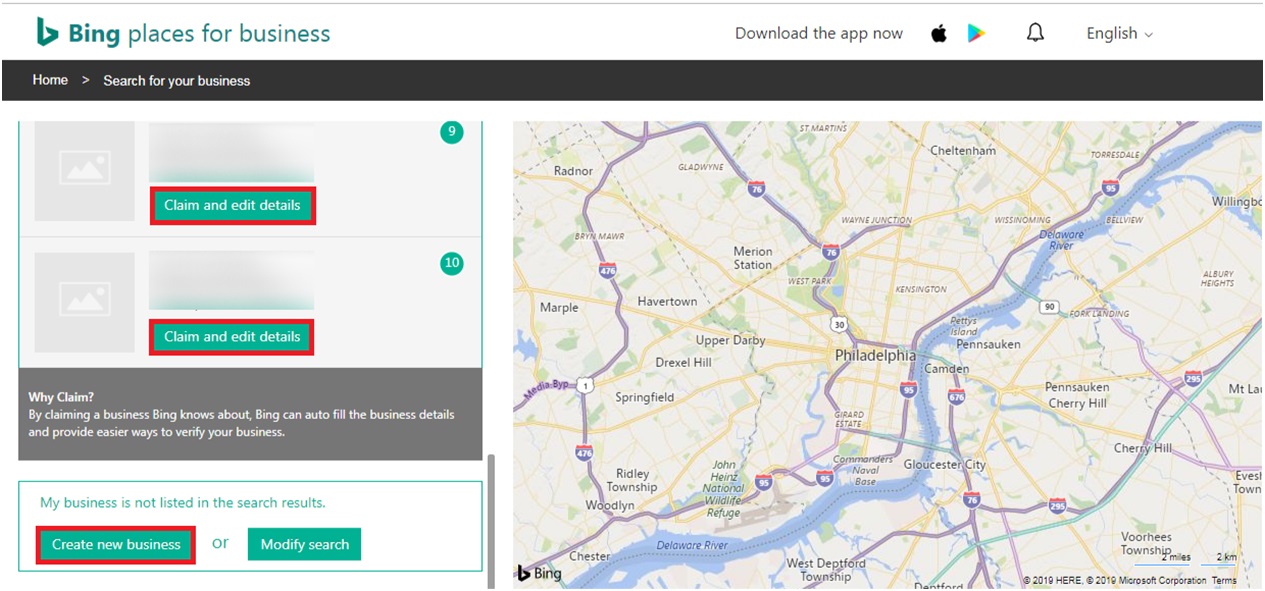
The next step is to search for your business using your business name and location or phone number to check the listing. We recommend searching both ways to ensure people will be able to find your listing no matter how they search.
After you find your business using the Bing search, click “Claim Business”. If you are not able to find your business don’t worry. Click “Create New Business” to add your business to Bing and help online customers discover your business easily.
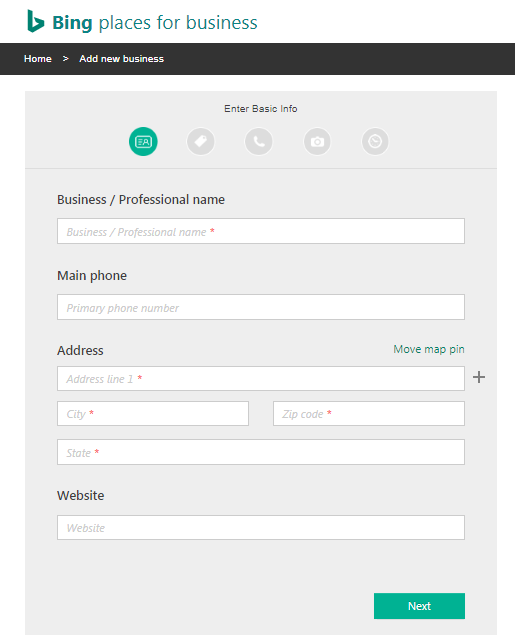
Step 4: Add Your Business Information Correctly
Whether you’re adding a new business to Bing or correcting the information for a business already located in Bing, the same screen will appear and you need to be extremely careful while adding information for your business. If you input incorrect information or make a mistake on the address or phone number you will be asked to re-verify the listing. So double-check any information so that it is accurate.
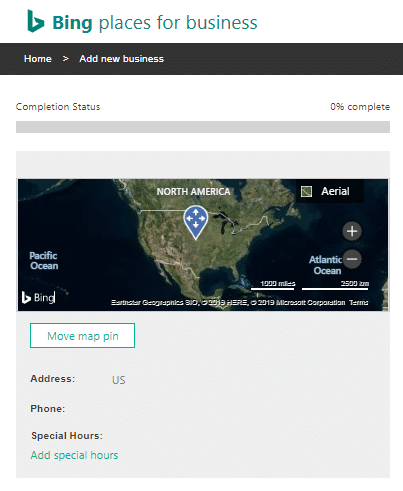
After this, you will be asked to recheck all the information before submitting it. You will have to cross-check the location of your map pin because Bing uses the map pin to provide directions to your customers from their current location. An incorrect map pin may send your customers to the wrong location and make it complex for them to find your physical business location.
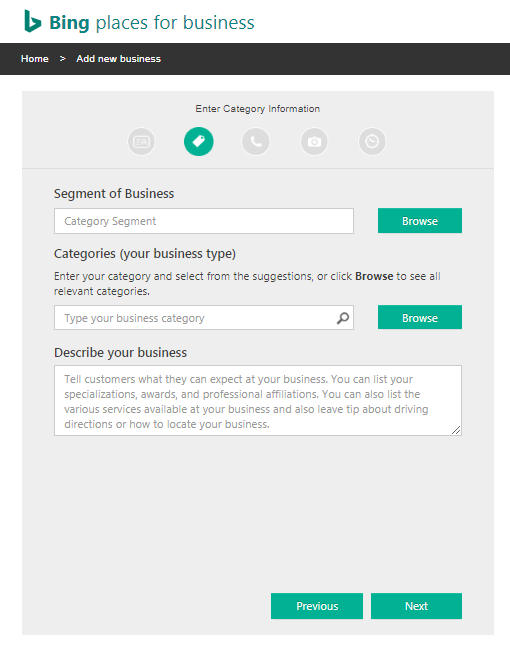
To make it easier for people to discover your business, you’re provided with a space to add additional information. Additional information includes additional phone numbers, multiple business categories, emails, photos, opening hours, etc.
Bing advises that adding the right categories is paramount for every business. Bing’s business categories help the Bing search engine categorize your type of business so that it will appear on the most relevant search results. Choose the categories that explicitly represent the characteristics of your business or services. Also, select a primary category that delineates your core business or services.
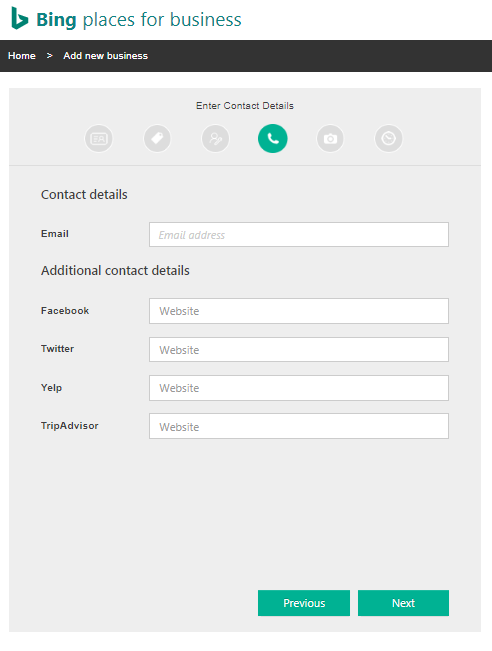
Add your business email and additional contact details so that your customers can contact you easily. Mention any numbers where you can be reached easily.
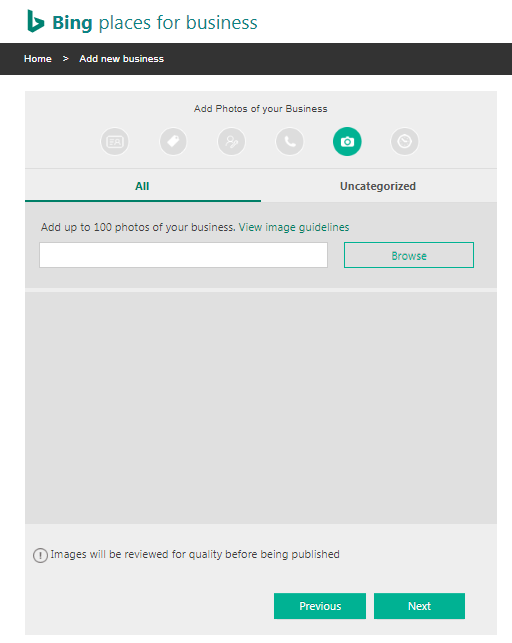
Adding some high-quality photos of your business on your Bing Business listing may help you gain customers. HD photos attract searchers because they are eye-catching and help to showcase your brand. A picture quickly can show your customers what your business has to offer them. As an example, a business that provides home services might consider uploading a professional team photo and examples of repair work. For individual practitioners like lawyers or real estate agents, searchers also want to see photos of your professional team.
You should consider the following types of photos- business logo, images of the business interior and exterior, employees at work, examples of services delivered, and before-and-after photos of your services.
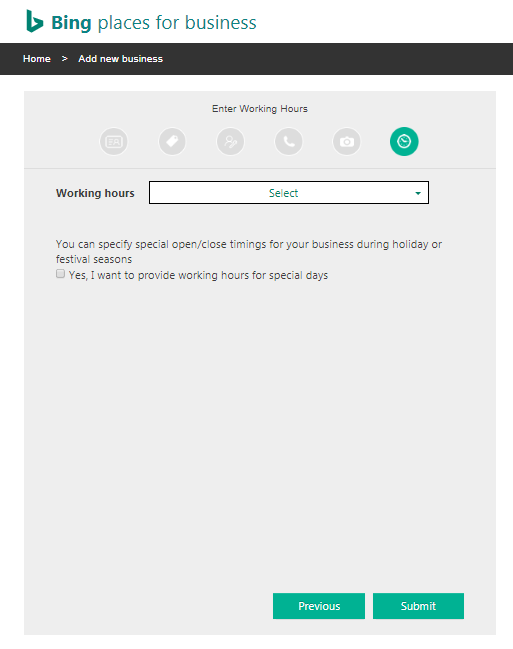
Ensure that your business working hours are accurate, and make sure there is someone present during these hours to help your customers because Bing has been known to check this, and can show your business as closed. If that is the case you can lose potential customers, sending them to your competitors.
Step 5: Verification of Your Business on Bing Places
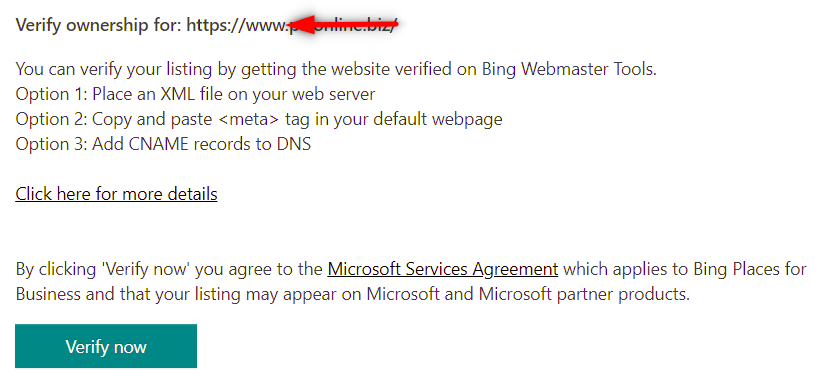
The last and final step is to verify your Bing Business listing through the five possible options you might be given. Whether you corrected any business information or added new business information, Bing will not allow you to publish the information until the business verification process is completed. Not all businesses are eligible to be verified with all the five possible options. The most common verification methods are phone verification and postcard verification.
The first four methods of verification will lead you to receive the verification PIN code. Verification PIN code can be sent by email to your public domain email address, by verification call to your business phone number, by SMS to your business phone number, or by the postcard sent to your business address. And the last of all the five options are web verification. You’ll be asked five questions which you need to answer correctly and the answers to the questions asked will only be known by you.
-
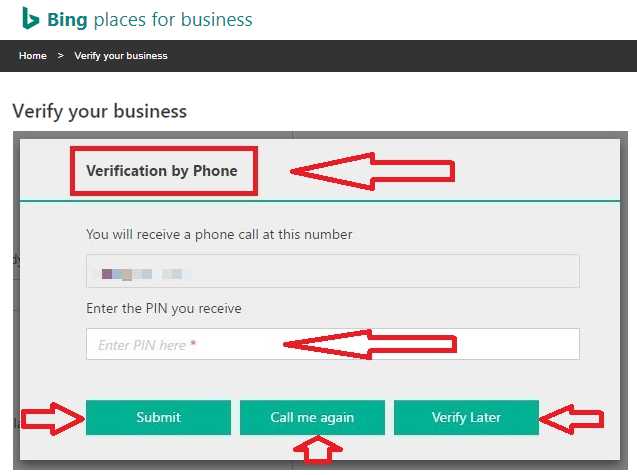
How to verify your Bing Places listing using a Phone
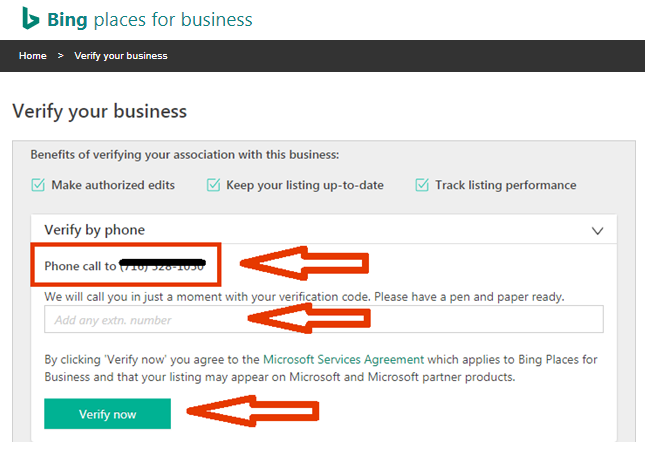
- Step 1: Bing Places will automatically fetch your registered business phone number and send an auto-call to that number with the Bing verification code. You do have the option of adding an extension number before you click “Verify Now” (shown in the image below).
-
- Step 2: You’ll get an automated call from Bing Places providing the verification code. You will need to listen carefully for the verification code and then add the Verification PIN on the specified box.
-
- Step 3: Once you get the verification PIN and add it to the specified box, click the “Submit” button.
In case you mess up entering the verification code, you can click “Call Me again” to get the verification phone call again. Also, if you want to verify the site later, click “Verify Later” (shown in the image below).
-
How to verify your Bing Places listing using Text Message (SMS)?
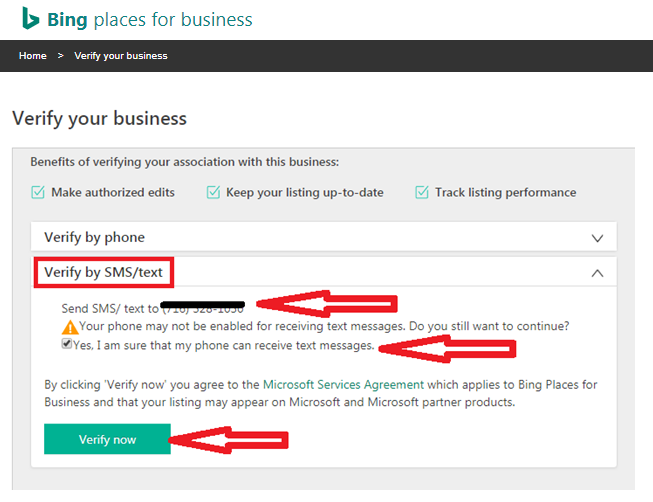
- Step 1: Bing will automatically fetch your registered business phone number on which you’ll get the Bing verification code via text message/SMS. Thereafter, just click “Verify Now” (shown in the image below).
-
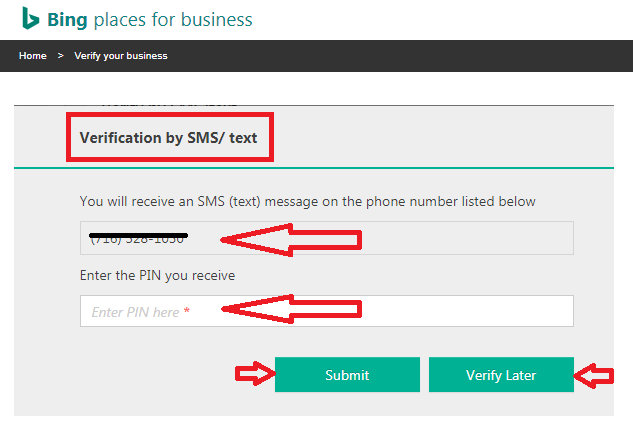
- Step 2:Once you’ve clicked “Verify Now”, you’ll receive the verification PIN via SMS on your business phone number.
- Step 3: Enter the verification PIN received via text message on the next screen that appears and clicks “Submit” to verify your Bing Business listing.
You can also choose to verify it later by clicking “Verify Later” (shown in the image below).
-
Bing Places listing verification using Business email:
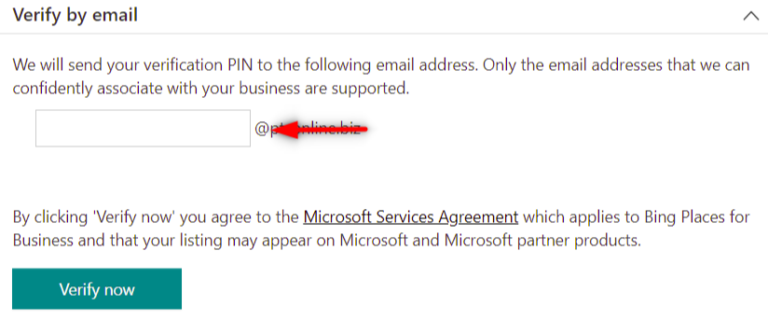
- Step 1-When you choose to receive the Bing Business listing verification PIN via email, you need to enter your business email ID (you will not be able to use a public domain email like Gmail or Outlook) on which you’ll receive a verification code. Then click “Check Mail” (shown in the image below).
-
- Step 2- Login to your given business email ID and check if you’ve received the verification PIN
- Step 3: Enter the verification PIN received via email on the next screen that appears and clicks “Submit“to verify your Bing Business listing.
If you tried this option and did not receive the verification code on your email ID then you may click “Resend Verification PIN on email” on the screen where you can enter the verification PIN. Check your spam mail, if you think the PIN may have ended up there.
-
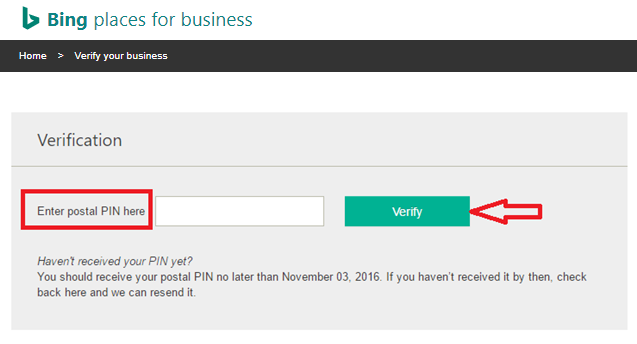
Bing Local Listing Verification using Post Card:
- Step 1– If you want to get the verification PIN for your Bing Business listing via a postcard in “mail” then Bing will automatically send a card to the business address with a verification PIN. Re-check the address and click “Verify Now”. You’ll receive the post from Bing for your Bing Places verification within 3-5 business days. Also, you may verify it later by clicking “Verify Later” (shown in the image below).
-
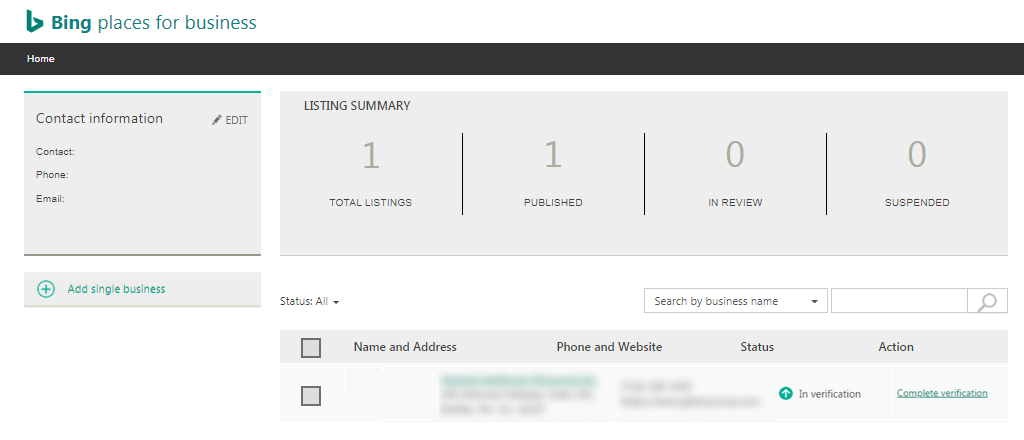
- Step 2- After 3-5 business days when you receive the post from Bing with the verification PIN, log back into https://www.bingplaces.com/ and sign in. There you’ll find the option to “Complete Verification”. Click this, and enter the verification postal PIN received via post to complete the verification process of the Bing Business listing.
-
How to verify your Bing Places listing using Web Verification Method:
- When you choose to verify your Bing Business listing via the web, you’ll be asked 5 questions related to your business that only you know and you will have to answer all of them correctly to verify your Bing business listing. Once you answer all the questions correctly your listing will be verified by Bing.
Always try to choose the easiest method of verification, so that Bing verifies your business listing as soon as possible. If you have trouble verifying via a PIN, look on the main screen of the dashboard where you can contact https://www.bingplaces.com/support. Bing assistants are very helpful and they will work with you to resolve your problem.
Once you’ve completed the verification process for Bing Business listing, your business will appear in the Bing search results whenever anyone searches for your business or services locally.
How To Verify Bing Places by Importing Your Google Business Profile
- Step 1: Hover towards bingplaces.com and click on “New User”.
- Step 2: Move towards the dialog box, appearing in the left-hand side section, and click on “Import from Google My Business Now”.
- Step 3: Click on the box showing “I want to sync my business data with Google My Business at regular intervals”, which applies the updates you make in Google to your Bing Places listing, followed by clicking on “Continue To Google My Business”.
- Step 4: Sign into your “Google My Business Account”.
- Step 5: Click on the “Allow” button.
- Step 6: Choose the particular business connected to the account then click on the “Continue” button.
- Step 7: Consider creating a user account by clicking on the “Google Account” button. This will also register your business using the same email address.
- Step 8: Verify the business information and click on the “Save” button.
- Step 9: Add your email address to Google My Business Account. Not adding your email address will result in a “Missing Address” message. You can change the mail address by clicking on “Review Address”.
- Step 10: Start with adding the physical address. You can hide the address while setting up the business listing. You can add or update an address by clicking on the “Edit” link.
- Step 11: Click on the “Next” button.
- Step 12: Add “Segment of Business”>” Primary Category” and then click on the “Next” button.
- Step 13: Select the “No, hide this address in search results…” followed by clicking the “Next” button.
- Step 14: Select the business logo from the photo collection along with setting up the business hours.
- Step 15: Click on “Submit”.
Optimization Strategies – Bing Places For Business Listing
Business Hours: Be specific and exhaustive when adding your business hours to your listing. This includes mentioning your standard open hours as well as special holidays.
- Keywords: Choose your business segment and categories carefully to make sure they include your top keywords. You can add additional keywords as services and products within your listing.
Social Media Integrations: You can integrate the online presence of your business with various social media profiles like Instagram and Facebook, to improve your Bing Places for a business listing. - Promotions: You can add special discounts and deals, or free trials to attract customers to boost your Bing Places listing.
Key Takeaways
Even though many search engine markets agree that your Google Business listing is more important, accurately representing your business on Bing Places is just as essential. Bing Places will widen your online presence and help create awareness about your company.
Note: This post was originally posted on August 2, 2019, and updated on August 11, 2022